Jupyter Notebooks: Getting Started#
Option 1: Google Colab#
Google Colab (short for Colaboratory) is a Jupyter notebook environment that runs in your browser using Google Cloud. You do not have to download or install any software. Your notebooks are stored in your Google Drive and can be shared with others.

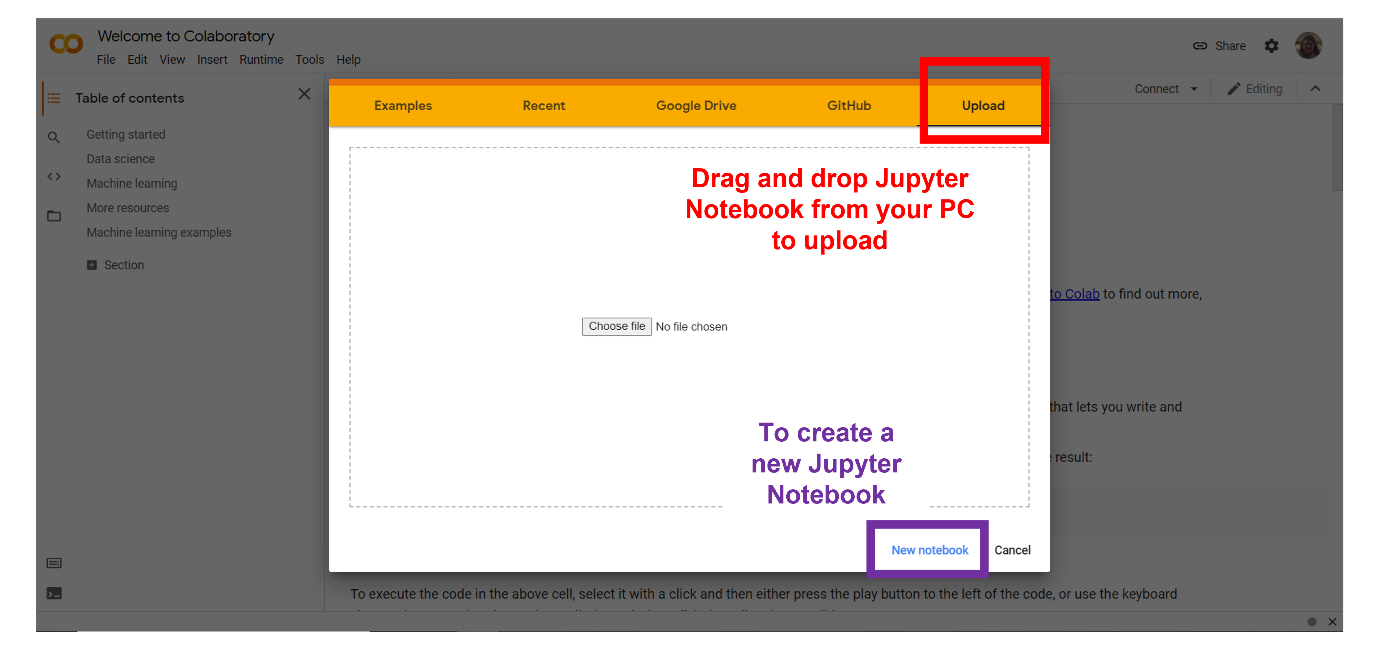
Go to Google Colab. You can upload a Jupyter notebook from your PC by dragging and dropping it in the Upload window. To create a new notebook, click “New notebook”.
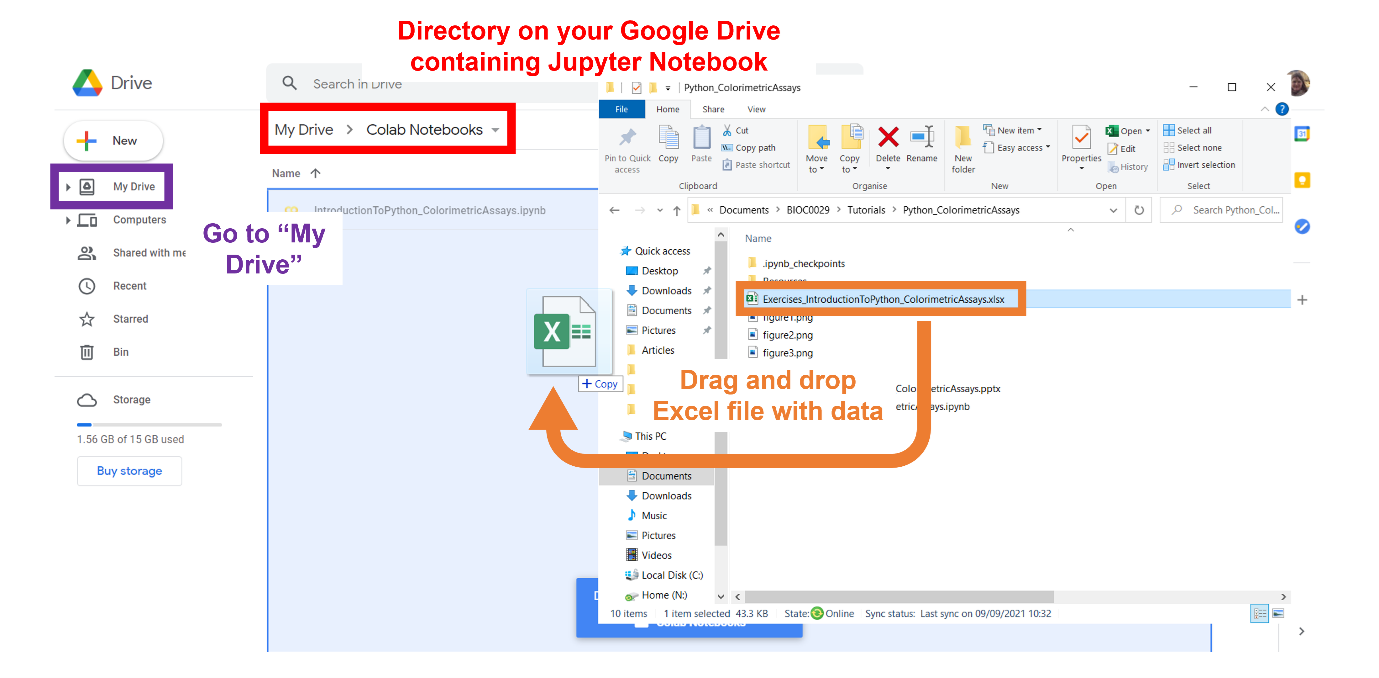
Data files (Excel or text) used in the Jupyter notebook need to be uploaded too! Go to your Google Drive and find the directory in which the Jupyter notebook is stored (“My Drive – Colab Notebooks” by default). You can upload the data file from your PC by dragging and dropping it in the window.
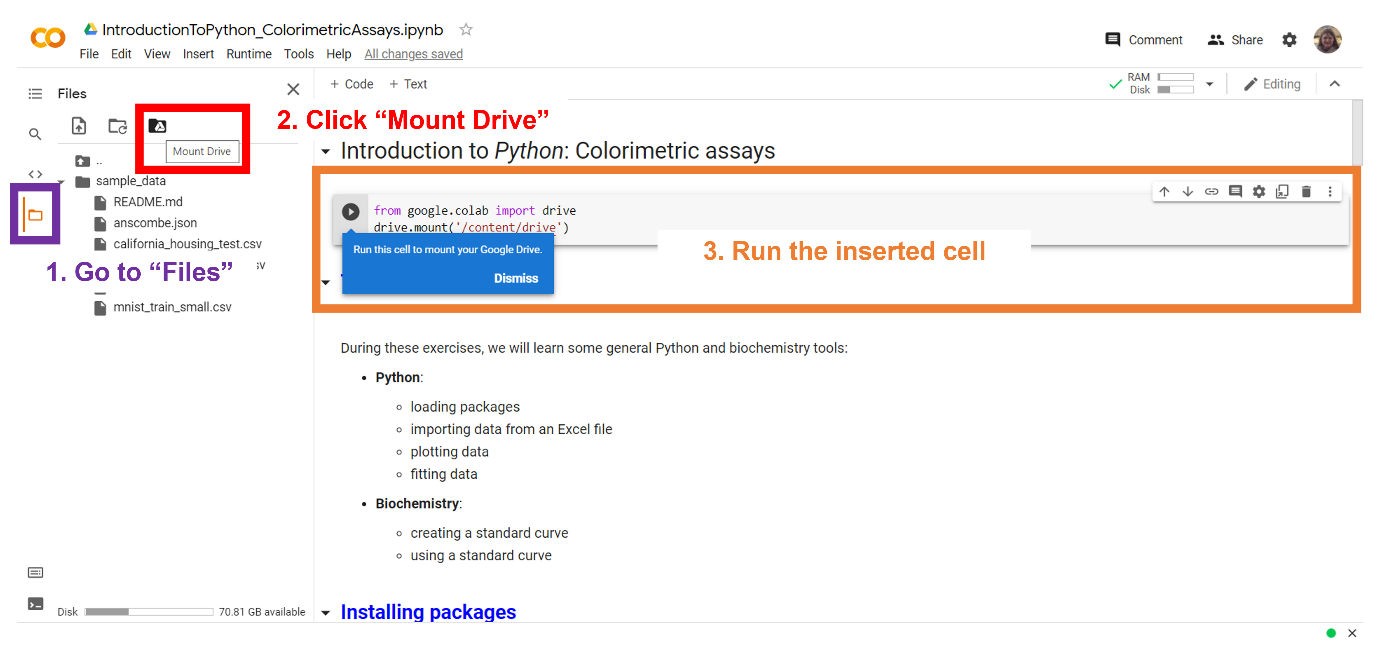
Loading files does require you to mount your Google Drive in your Colab notebook. First, open the file browser on the left-hand side. It will show a “Mount Drive” button. Once clicked, you will see a code cell appear. Run the code. You are taken to a Google authentication step. After accepting the conditions, copy the verification code and paste it in the area dedicated in your Colab notebook.
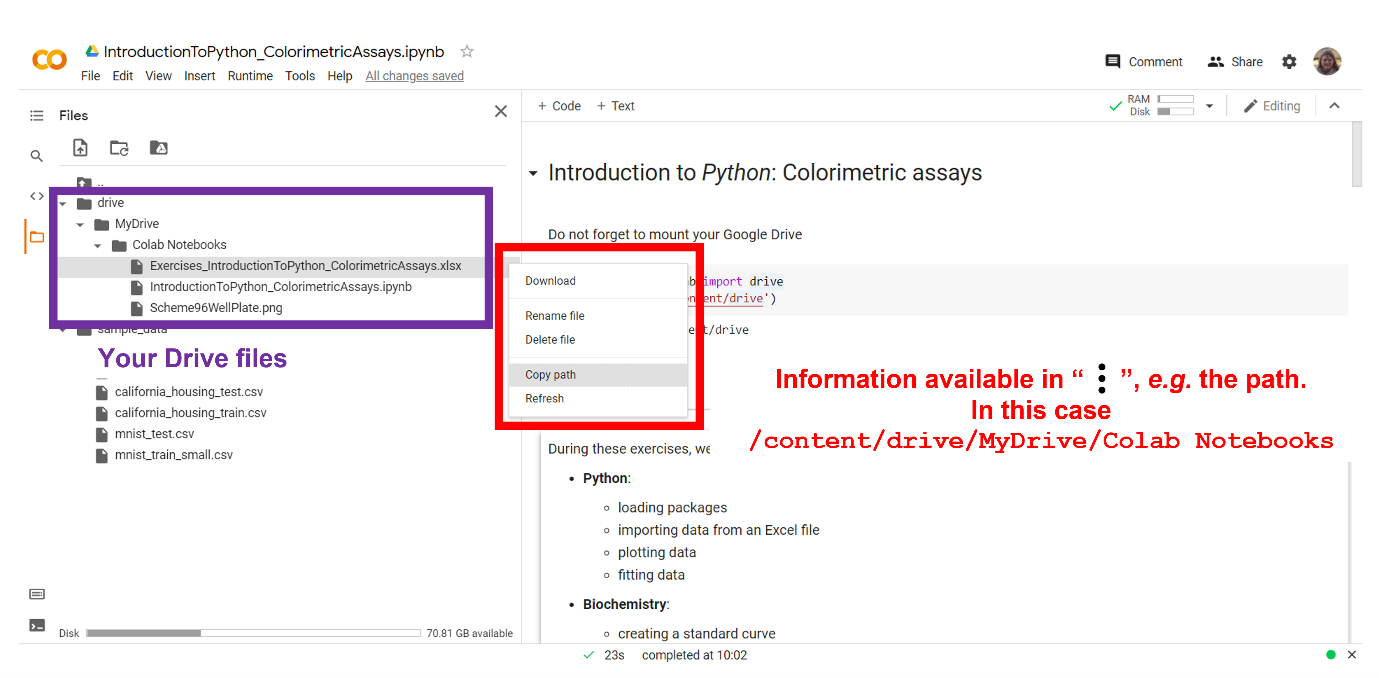
You can now interact with your Drive files in the file browser side panel. Click on the “three dots” icon next to a file to find e.g. the path information.
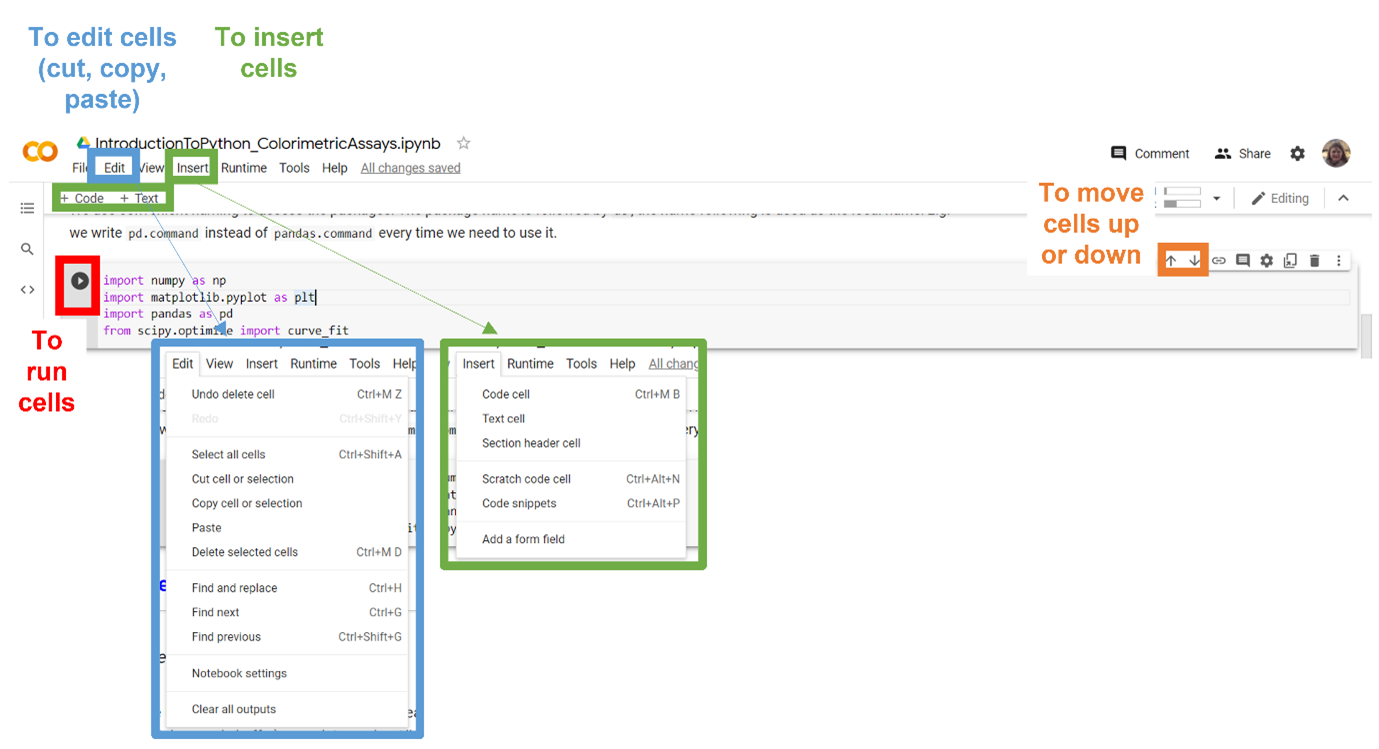
The following figure shows you how to insert, change type, edit, and run cells.
Recall that a Jupyter notebook consists of code cells that allow you to write and run programming code and text (=Markdown) cells that allow you to describe your workflow.
You can run any cell, code or text. Running a code cell will display the result or output below the code cell that you run. When you run a text cell, the text formatted using Markdown syntax will be rendered as stylized text.
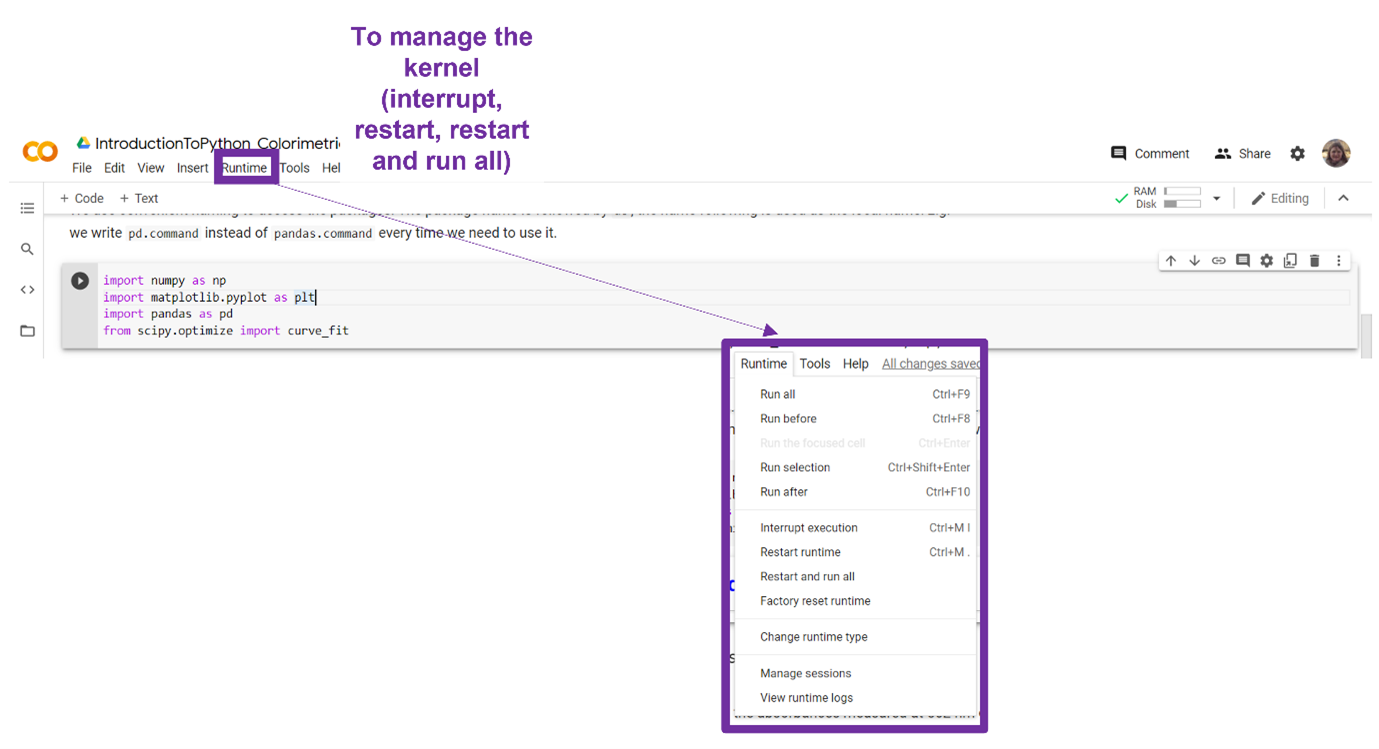
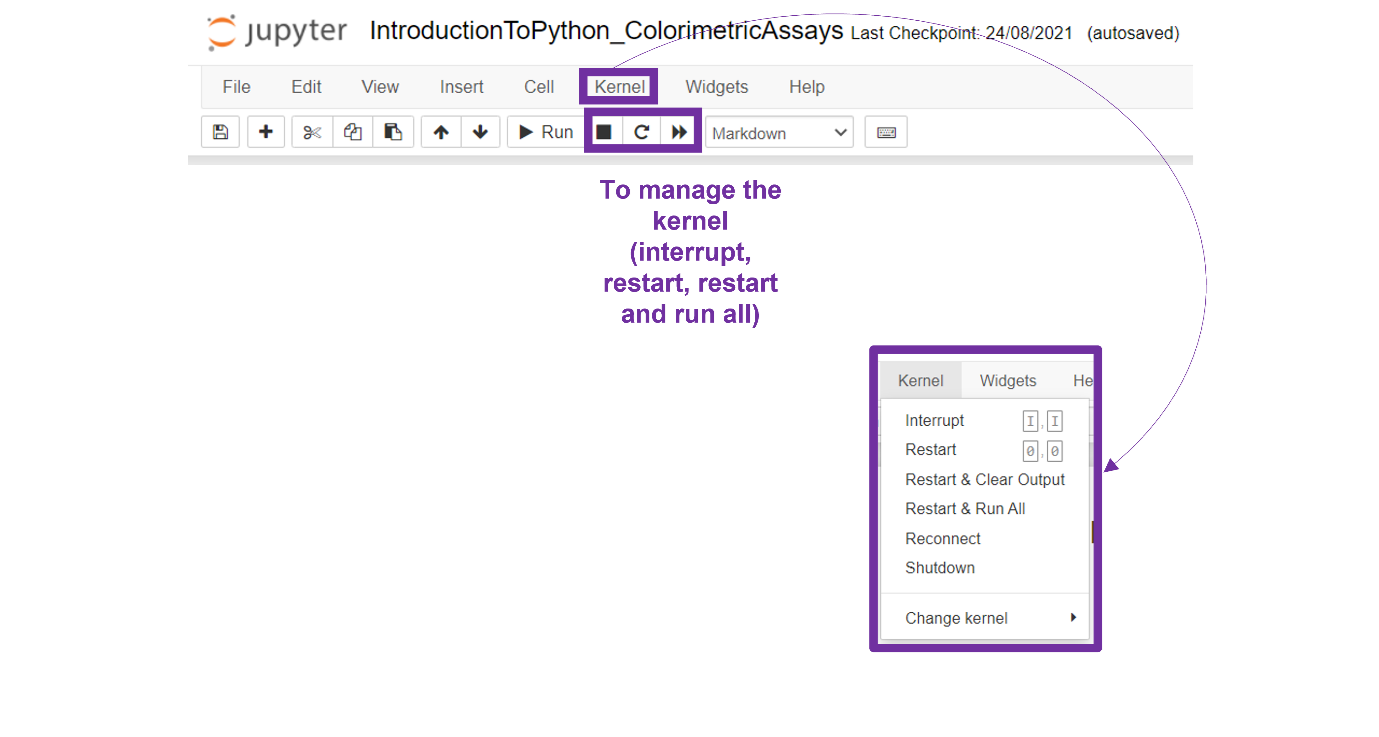
Each Jupyter notebook uses a kernel. The kernel runs your code in a specific programming language, in our case, Python. It also maintains the state of your notebook’s computations. If your code is acting weird, sometimes it is best to clear all outputs and restart the kernel. This will clear all in memory objects and restart your code from the beginning of your notebook. The following figure shows you how.
Option 2: Anaconda#
Anaconda is an open-source Python and R distribution platform. It is a package manager that helps you to work with multiple open-source packages and libraries by creating a reproducible environment.

Download Anaconda. We recommend downloading Anaconda’s latest Python version. It will take a while to download as it is a large file.
Install the version of Anaconda which you downloaded, following the instructions.
Launch the Jupyter notebook app by clicking on the Jupyter notebook icon installed by Anaconda in the start menu or by typing
jupyter notebookin a terminal.

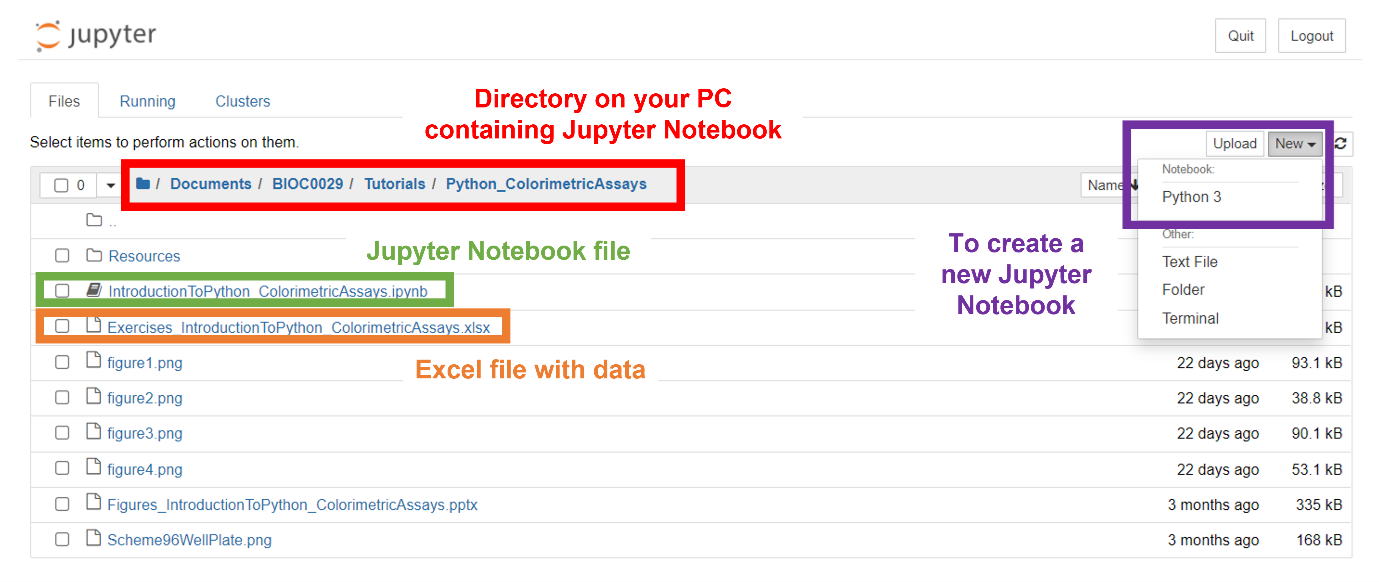
A new browser window or tab will open showing the Jupyter notebook dashboard from which you can go to the directory in which you saved your Jupyter notebook on your PC. All Jupyter notebooks are identifiable by the notebook icon next to their name. Double click on the notebook you want to open. To create a new notebook, click “New – Python 3”.
If you include your data files (Excel or text) used in the Jupyter Notebook in the same directory, you do not need to include path information in your code.
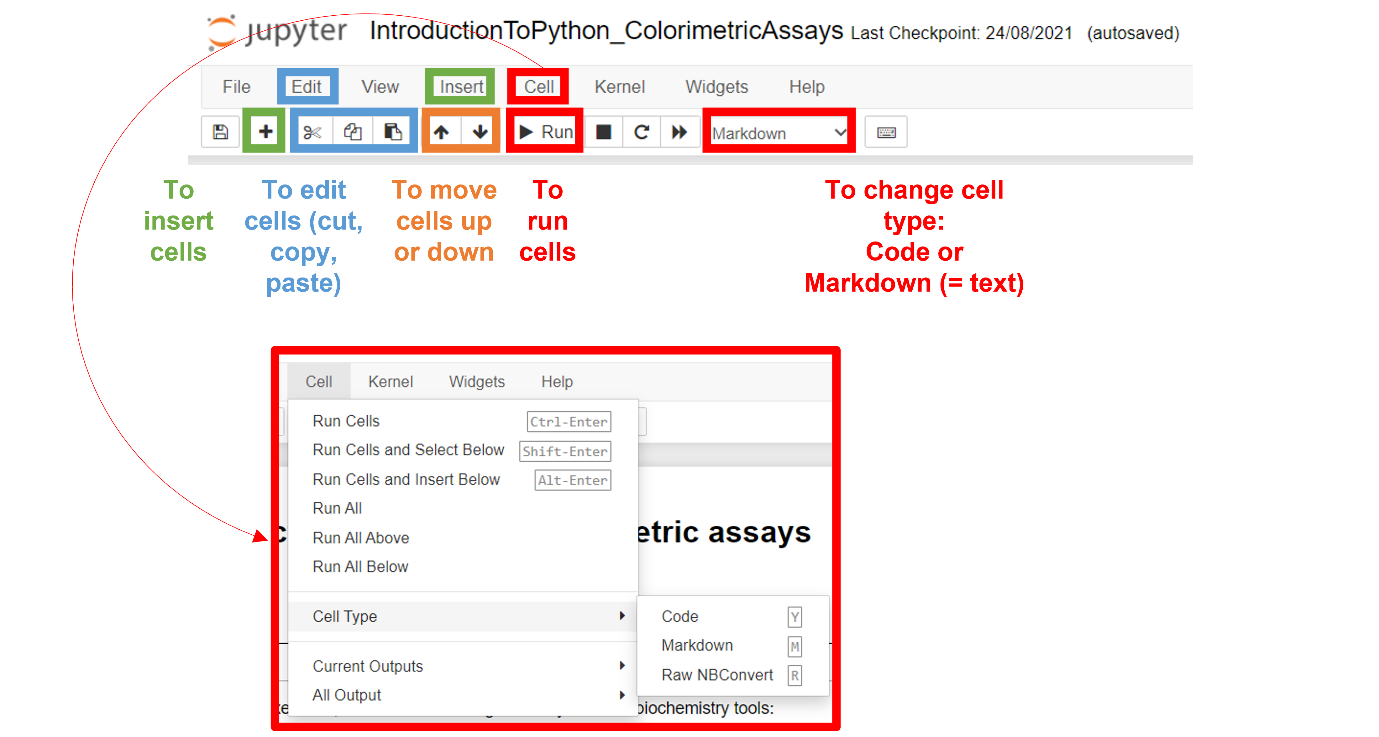
The following figure shows you how to insert, change type, edit, and run cells.
Recall that a Jupyter notebook consists of code cells that allow you to write and run programming code and text (=Markdown) cells that allow you to describe your workflow.
You can run any cell, code or text. Running a code cell will display the result or output below the code cell that you run. When you run a text cell, the text formatted using Markdown syntax will be rendered as stylized text.
Each Jupyter notebook uses a kernel. The kernel runs your code in a specific programming language, in our case, Python. It also maintains the state of your notebook’s computations. If your code is acting weird, sometimes it is best to clear all outputs and restart the kernel. This will clear all in memory objects and restart your code from the beginning of your notebook. The following figure shows you how.
Exercises#
Data#
Get the data needed for these exercises here.
Store the data somewhere you know, e.g. in a BIOC0029 folder in your Documents folder on your PC or in a BIOC0029 folder on your Google Drive.
Jupyter Notebooks#
Start a Jupyter Notebook file, either in Google Colab or Anaconda, to try out the exercises in the following chapters.
Use the ‘copy code to clipboard’ symbol visible in the top right corner of code code cells when hovering over them to copy and paste code from the exercises to your Jupyter Notebook.

Use markdown cells and comment lines to explain the purpose of your Jupyter Notebook and code.
Execute code cells by placing your cursor in the code cell and hitting Shift and Enter. The result will print out in the Raw NBConverter output cell.
